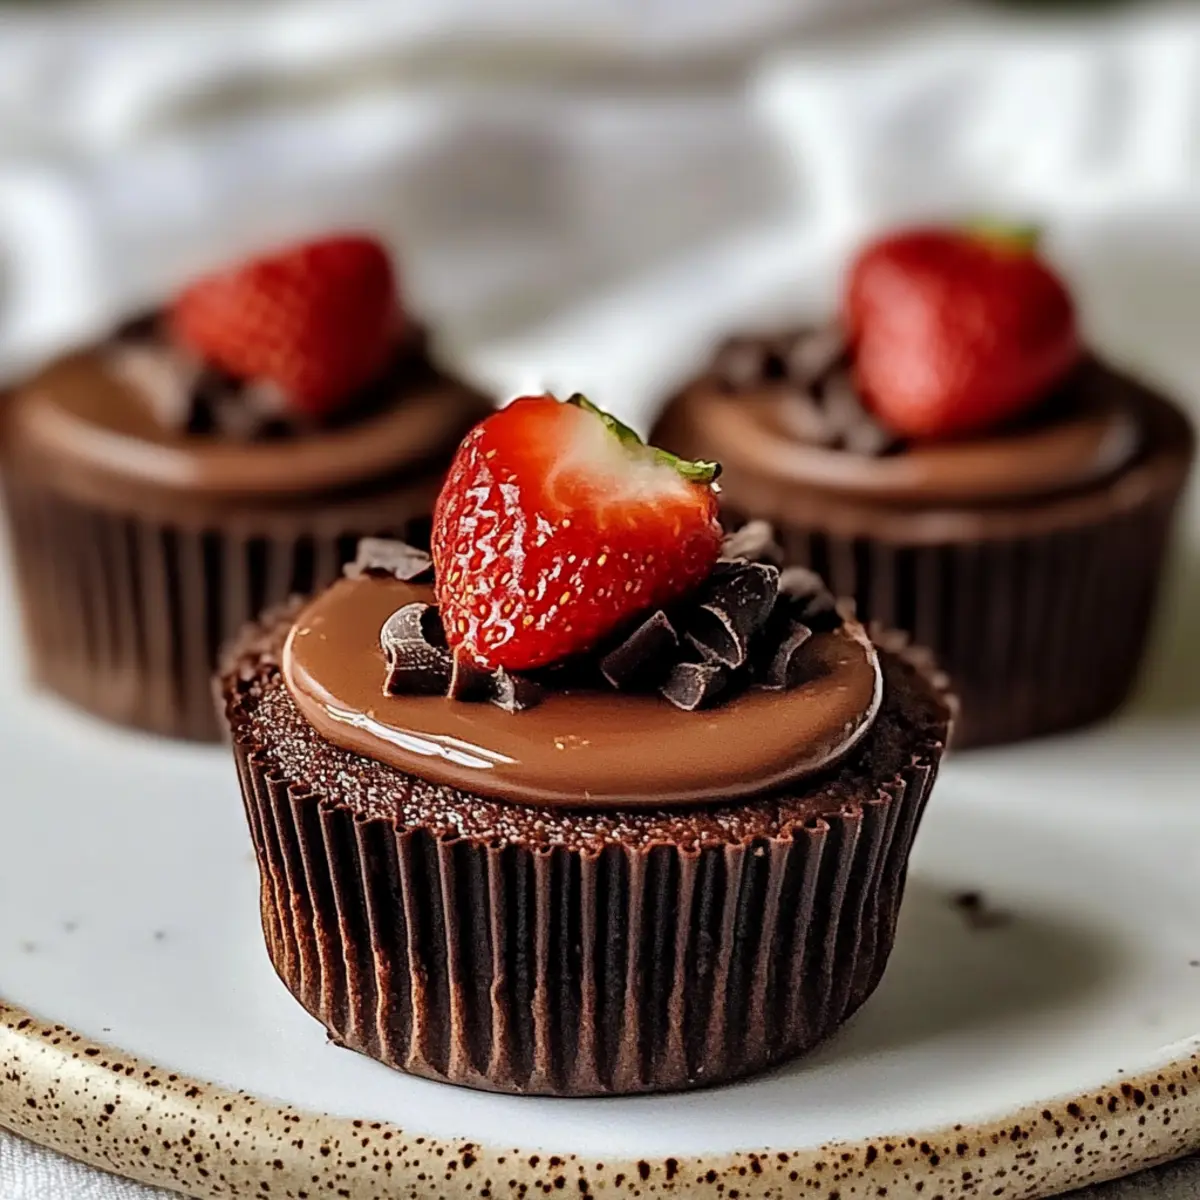
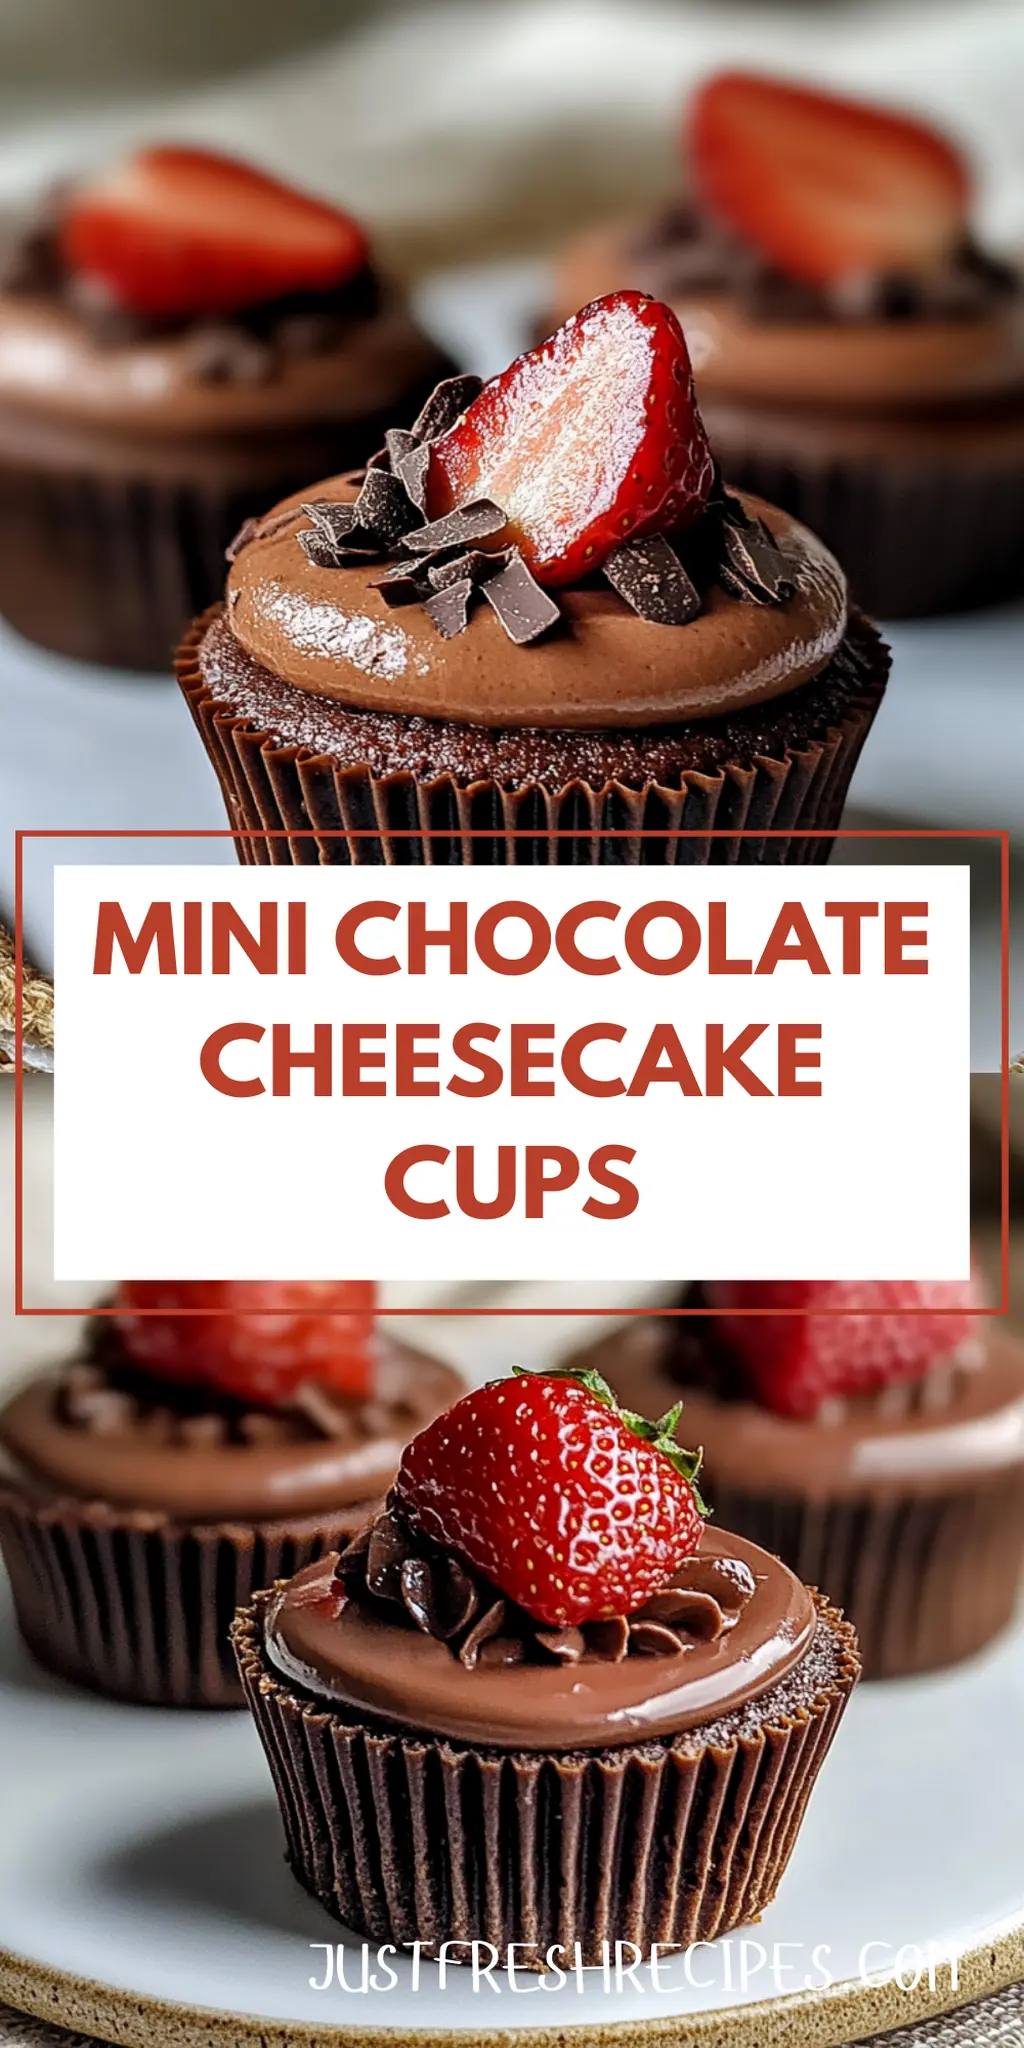
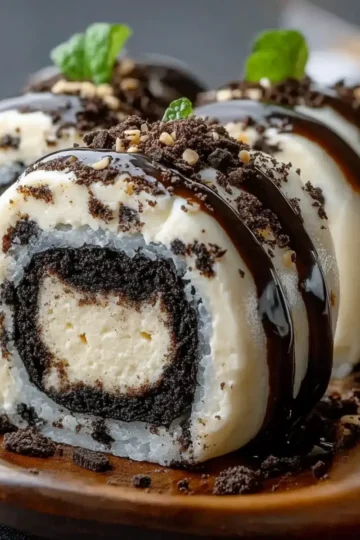
There's something wonderfully comforting about indulging in a rich dessert after a long day, and these Mini Chocolate Cheesecake Cups are my go-to treat for just that. Picture this: velvety cream cheese combined with a hint of chocolate, all nestled in a buttery graham cracker crust. The first bite releases a wave of sweetness that balances perfectly with a light, airy whipped cream topping. It’s like having a little piece of heaven in each cup!
I stumbled upon this recipe during a weekend baking spree when I was craving something decadent yet manageable. With just a handful of ingredients and minimal time, I realized the potential for impressing family and friends without spending hours in the kitchen. Whether you're a seasoned chef or just someone looking to switch up your dessert game, these Mini Chocolate Cheesecake Cups are sure to please. They’re perfect for gatherings, or just a delightful personal treat to enjoy on the couch with your favorite show. Let's dive into this deliciously easy recipe together!
Why You'll Love This Mini Chocolate Cheesecake Cups
- These Mini Chocolate Cheesecake Cups are incredibly easy to make, requiring just a few simple ingredients and minimal prep time.
- The rich chocolate flavor combined with the creamy cheesecake creates a decadent dessert experience that will leave your taste buds dancing.
- Their miniature size makes them perfect for hosting gatherings, ensuring that everyone gets a delightful bite without the guilt of a full slice.
- Plus, the attractive presentation of these individual cups adds a touch of elegance to any occasion, making them a crowd-pleaser that will impress your guests.
Mini Chocolate Cheesecake Cups Ingredients
Let’s gather what you need to create these delightful little treats!
For the Crust
- Graham cracker crumbs – perfect for giving a sweet, crunchy base that complements the creamy filling.
- Unsweetened cocoa powder – adds a rich chocolate flavor and enhances the dessert’s indulgence.
- Granulated sugar – balances the flavors and brings just the right amount of sweetness.
- Unsalted butter, melted – binds the crust ingredients together and adds a delightful buttery taste.
For the Filling
- Cream cheese, softened – the main star, providing that luscious and creamy texture everyone loves.
- Sour cream – adds tanginess to balance the sweetness and creates a smooth filling.
- Granulated sugar – sweetens the filling to perfection; feel free to use less if you prefer it less sweet.
- Vanilla extract – infuses a warm flavor, enhancing the overall taste of the cheesecake.
For the Topping
- Heavy whipping cream – whipped until soft peaks form, it adds lightness and aeration to the dessert, making it extra luxurious!
With these Mini Chocolate Cheesecake Cups ingredients in hand, you’re set to create irresistible delights that will have everyone asking for seconds!
How to Make Mini Chocolate Cheesecake Cups
-
Preheat your oven to 350°F (175°C). Grab a mixing bowl and combine the graham cracker crumbs, cocoa powder, granulated sugar, and melted butter until well blended. This delicious mixture will form the crust of your cheesecake cups!
-
Press the crust mixture firmly into the mini muffin tins lined with cupcake liners. Make sure to compact it well to create a sturdy base that holds up during baking.
-
Beat the softened cream cheese in a large mixing bowl until smooth and creamy. Gradually add the sour cream, granulated sugar, and vanilla extract, blending until fully combined. This rich filling is the heart of your cheesecake!
-
Spoon or pipe the cheesecake mixture over each crust until they are three-quarters full. This ensures a balanced cheesecake-to-crust ratio, so each bite is delightful.
-
Bake in your preheated oven for 15-18 minutes. The cups should be set but still slightly jiggle in the center. Once baked, cool them at room temperature before transferring them to the fridge to chill for at least two hours. Patience here pays off!
-
Whip the heavy cream until soft peaks form. This airy topping will elevate your Mini Chocolate Cheesecake Cups. Generously spoon or pipe it over each cheesecake cup for that final touch.
Optional: Top with chocolate shavings or fresh berries for an extra burst of flavor!
Exact quantities are listed in the recipe card below.
Mini Chocolate Cheesecake Cups Variations
Feel free to get creative with these Mini Chocolate Cheesecake Cups to suit your tastes and preferences!
-
Gluten-Free: Use gluten-free graham cracker crumbs or crushed nuts as a base for the crust to enjoy these treats without worry.
-
Vegan: Replace cream cheese with a block of silken tofu blended with cocoa, use coconut cream, and maple syrup for a dairy-free alternative.
-
Nutty Twist: Add chopped nuts, like pecans or walnuts, to the crust mixture for an added crunch and delightful flavor boost.
-
Flavor Infusion: Stir in a tablespoon of espresso powder or melted chocolate into the filling to elevate the chocolate flavor and add complexity.
-
Fruit Delight: Top with fresh raspberries or strawberries for a burst of fruity sweetness that perfectly complements the creamy cheesecake.
-
Decadent Add-in: Fold in mini chocolate chips to the filling for a melty surprise in each bite.
-
Spice It Up: Add a pinch of cayenne pepper or chili powder to the filling for a surprisingly delightful kick.
-
Alternative Sweeteners: Swap granulated sugar for honey, agave syrup, or a sugar substitute to cater to different dietary needs without sacrificing flavor.
With these variations, you can personalize each cup to make it uniquely yours, ensuring every bite is as delightful as the last!
Make Ahead Options
These Mini Chocolate Cheesecake Cups are perfect for busy home cooks looking to save time in the kitchen! You can prepare the crust up to 24 hours in advance by mixing the graham cracker crumbs, cocoa powder, sugar, and melted butter, then pressing it into muffin tins. Store the crust in the fridge to keep it fresh. Additionally, the cheesecake filling can be made up to 3 days ahead; simply beat the cream cheese, sour cream, sugar, and vanilla, then refrigerate it until you're ready to assemble. When it's time to bake, spoon the filling over the prepared crusts and follow through with the baking instructions. This way, you'll have delightful dessert cups ready with minimal effort for gatherings or weeknight treats!
What to Serve with Mini Chocolate Cheesecake Cups?
Imagine gathering friends and family around the table to share a delightful meal that harmonizes perfectly with these irresistible treats.
-
Fresh Berries: The tartness of strawberries, raspberries, or blueberries adds a refreshing contrast to the creamy sweetness of the cheesecake cups, making for a balanced dessert experience.
-
Espresso or Coffee: Pairing your Mini Chocolate Cheesecake Cups with a rich espresso or freshly brewed coffee enhances their deep chocolate flavor and offers a delightful cozy moment.
-
Vanilla Ice Cream: A scoop of creamy vanilla ice cream beside the cheesecake cups creates a luxurious combination of temperatures and textures, elevating your dessert indulgence.
-
Mint Leaves: Garnishing with fresh mint brings a bright, aromatic element that cuts through the richness, providing a lovely herbal note to each bite.
-
Chocolate Drizzle: A simple drizzle of warm chocolate sauce over the top magnifies the chocolatey goodness while adding an extra touch of elegance for special occasions.
-
Whipped Cream: Serving extra whipped cream on the side invites guests to customize their dessert experience, and the lightness of the cream complements the richness of the cheesecake beautifully.
-
Sparkling Water: For a refreshing drink option, chilled sparkling water adds a fizzy lift, cleansing the palate and enhancing the overall dessert enjoyment.
-
Chocolate-Covered Strawberries: This indulgent pairing not only looks stunning on the table but also offers a delightful flavor match that chocolate lovers will adore.
These delightful pairings will certainly enhance your dessert experience, making your time together even more special and memorable!
How to Store and Freeze Mini Chocolate Cheesecake Cups
Fridge: Keep your Mini Chocolate Cheesecake Cups in an airtight container for up to 5 days. Make sure they're fully chilled before covering to prevent condensation.
Freezer: To freeze, wrap each cheesecake cup tightly in plastic wrap and then in aluminum foil. They can be stored for up to 2 months. Thaw in the fridge before enjoying.
Reheating: If you prefer them slightly warmed, microwave for 10-15 seconds; however, they're best served chilled for that creamy texture.
Serving Tip: Garnish with whipped cream or chocolate shavings right before serving for an eye-catching finish!
Chef's Helpful Tips
- To ensure a perfect crust for your Mini Chocolate Cheesecake Cups, press the graham cracker mixture firmly into the muffin tins so it holds together during baking.
- Avoid overmixing the cream cheese filling as this can introduce excess air and lead to cracks in your cheesecakes.
- When baking, check for doneness by looking for a slight jiggle in the center, as overbaking can dry them out.
- Lastly, remember to chill the cheesecakes for at least two hours after baking to achieve the best texture and flavor.
Mini Chocolate Cheesecake Cups Recipe FAQs
How do I choose the right cream cheese for my Mini Chocolate Cheesecake Cups?
When selecting cream cheese, look for blocks that are labeled “full-fat” as they provide the best texture and flavor for your cheesecake. Make sure it’s softened before mixing to prevent lumps and ensure a smooth filling. The cream cheese should have a creamy color without any cracks or dark spots.
What’s the best way to store leftover Mini Chocolate Cheesecake Cups?
Absolutely! To store your cheesecake cups, place them in an airtight container and keep them in the fridge for up to 5 days. It’s important to let them cool completely before covering them. If you're looking to preserve them longer, you can freeze them (instructions below).
Can I freeze Mini Chocolate Cheesecake Cups? How?
Yes, you can freeze these delectable treats! To do so, first wrap each cheesecake cup individually in plastic wrap. Then, place them in a freezer-safe container or sealable bag. They can be frozen for up to 2 months. When you're ready to enjoy them, thaw them overnight in the refrigerator. This method helps maintain their creamy texture.
What should I do if my cheesecake cups crack while baking?
If you notice cracks after baking, don’t worry; they’ll still taste amazing! To avoid cracks in the future, ensure you mix the filling just until combined; overmixing can incorporate too much air. Also, remember to bake at a steady temperature and let them chill properly afterward. Check for doneness by looking for a slight jiggle in the center before removing them from the oven.
Are Mini Chocolate Cheesecake Cups suitable for people with allergies?
You can definitely customize these cheesecake cups! If someone you’re serving has dairy allergies, consider using a dairy-free cream cheese alternative and coconut cream for the topping. For those with gluten sensitivities, swap the graham cracker crumbs for a gluten-free variety. Always check allergen labels to be safe!
What is the ideal way to serve Mini Chocolate Cheesecake Cups?
To serve, I recommend garnishing each cheesecake cup with a dollop of whipped cream or chocolate shavings right before placing them on the table. For an added touch of elegance, consider topping them with fresh berries or a sprinkle of cocoa powder. Each little cup will not only taste delightful but also look stunning!
Mini Chocolate Cheesecake Cups
Ingredients
Equipment
Method
- Preheat your oven to 350°F (175°C). Combine the graham cracker crumbs, cocoa powder, granulated sugar, and melted butter until well blended.
- Press the crust mixture firmly into mini muffin tins lined with cupcake liners.
- Beat the softened cream cheese in a large mixing bowl until smooth. Gradually add sour cream, granulated sugar, and vanilla, blending until fully combined.
- Spoon or pipe the cheesecake mixture over each crust until they are three-quarters full.
- Bake for 15-18 minutes until set but slightly jiggly in the center. Cool at room temperature, then refrigerate for at least 2 hours.
- Whip the heavy cream until soft peaks form and spoon or pipe it over each cheesecake cup.

Leave a Reply