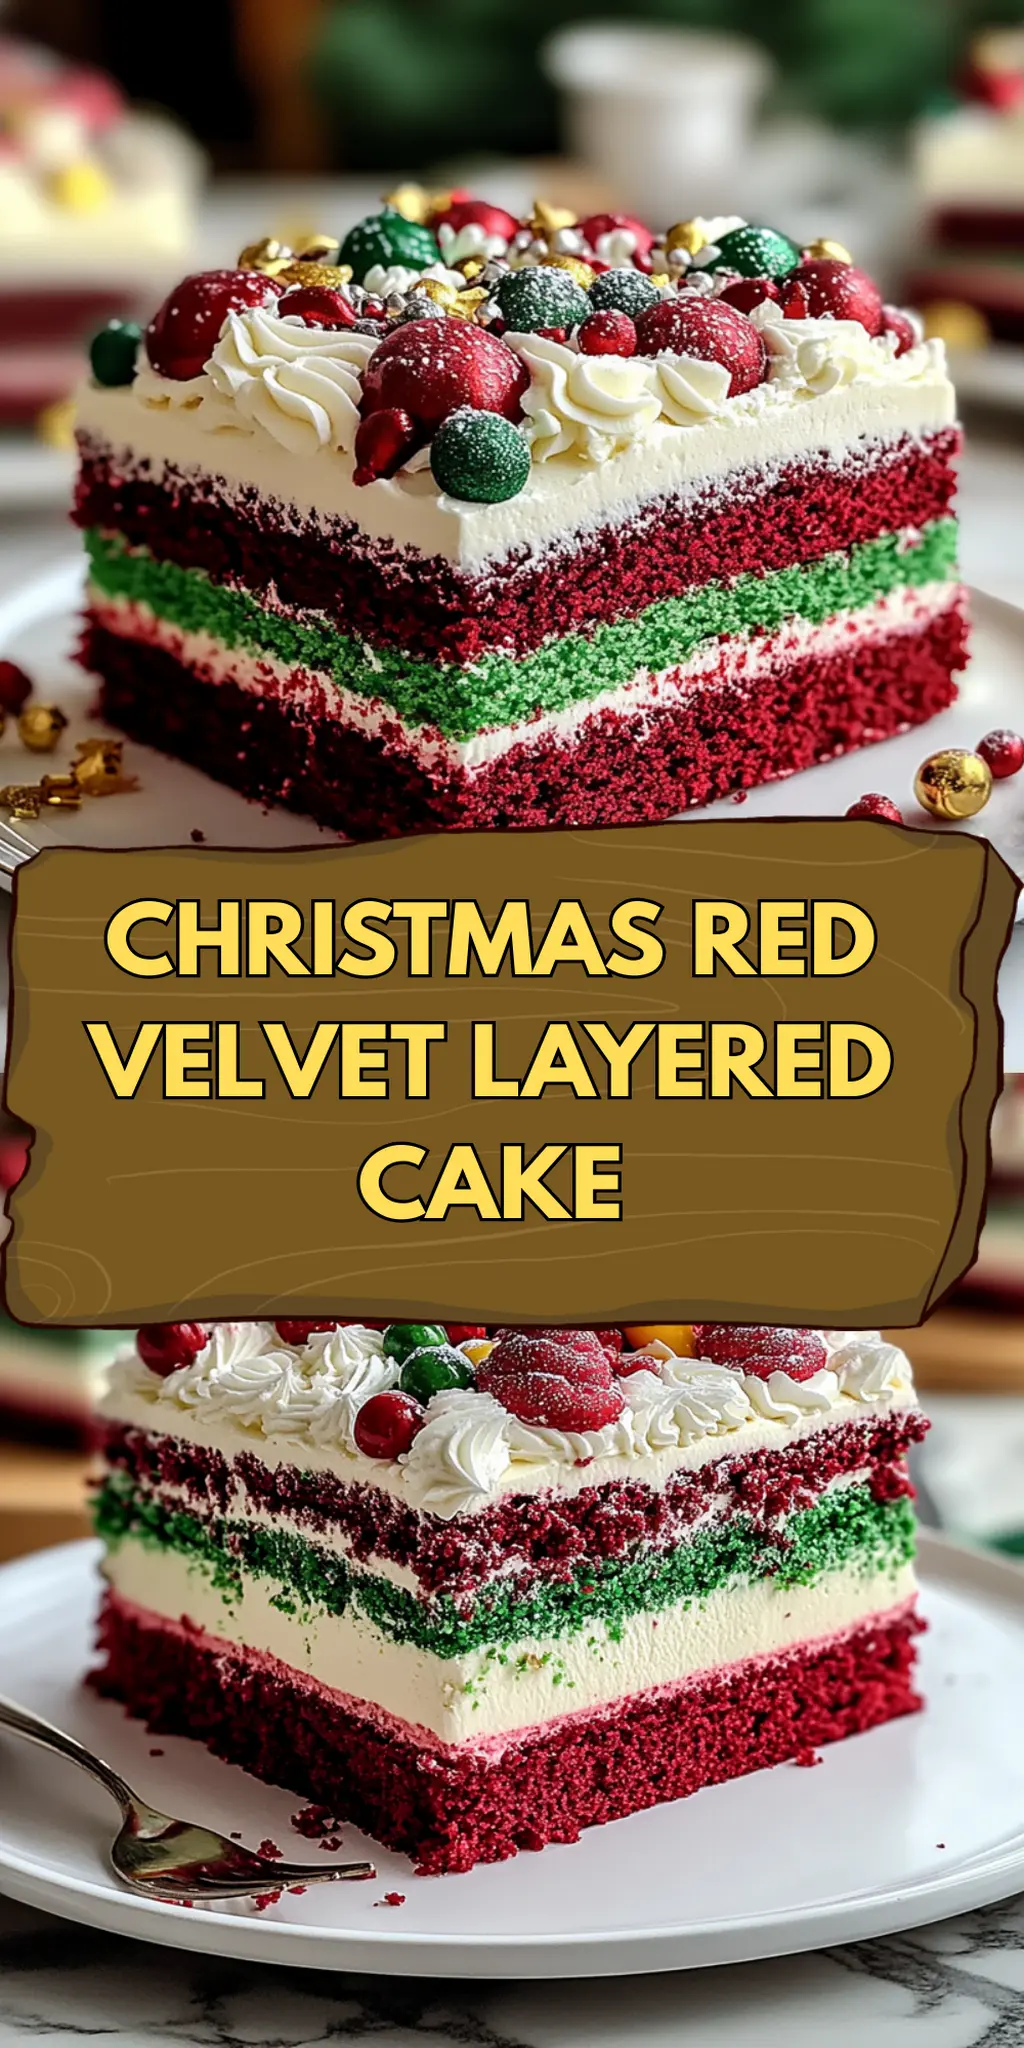
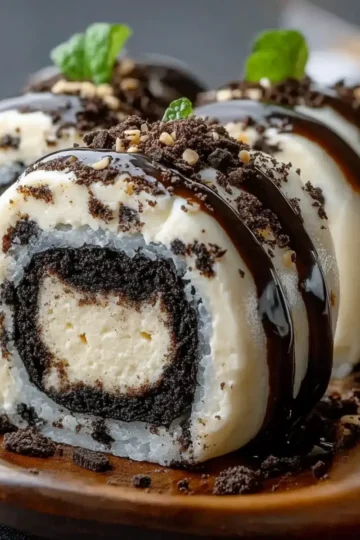
As the holiday season approaches, there’s something undeniably enchanting about the rich crimson hue of a Christmas Red Velvet Layered Cake gracing the dessert table. Just the thought of slicing into those vibrant layers, revealing fluffy, velvety cake adorned with creamy frosting, sparks joy and nostalgia. Last year, during a bustling holiday gathering, I found myself captivated by my cousin's creation, which seemed to magically elevate the entire evening.
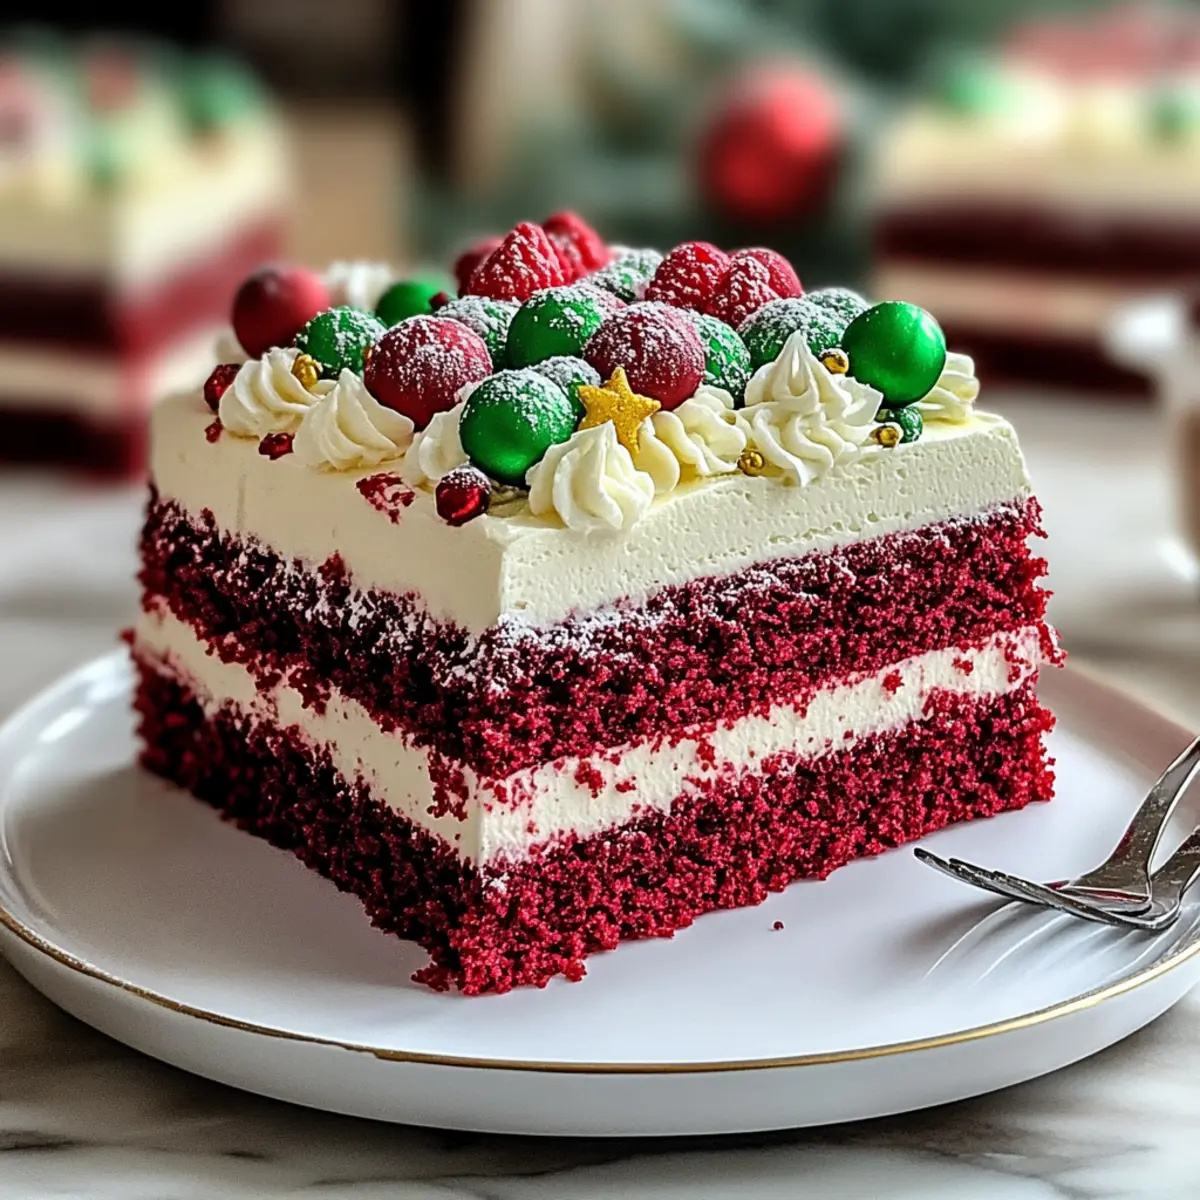
I knew I had to recreate that showstopper for my own family this Christmas. With its luscious texture and a hint of cocoa, this cake is not just a feast for the eyes; it’s a delightful symphony of flavor with each bite. What I love most about this recipe is how accessible it is—perfect for both seasoned bakers and holiday novices.
Whether you're hosting a festive gathering, bringing dessert to a potluck, or simply indulging in the joys of baking for yourself and loved ones, this cake will undoubtedly leave a lasting impression. Let's dive into the cozy kitchen magic that makes this Christmas Red Velvet Layered Cake the highlight of the season!
Why You'll Love This Christmas Red Velvet Layered Cake
- This Christmas Red Velvet Layered Cake is incredibly easy to make, allowing bakers of all skill levels to impress their guests effortlessly.
- The combination of rich red velvet cake and creamy frosting creates a delightful flavor that will leave everyone craving more.
- Its stunning visual appeal makes it a perfect centerpiece for your holiday table, capturing the festive spirit beautifully.
- Plus, with a total time of just 50 minutes, you can whip up this dessert without sacrificing your holiday plans, making it a real time-saver.
Christmas Red Velvet Layered Cake Ingredients
For the Cake
• All-purpose flour – gives the cake structure, making it fluffy and tender.
• Granulated sugar – sweetens the cake while adding moisture and richness.
• Vegetable oil – enhances the cake's moisture, creating a light and tender texture.
• Buttermilk – adds tanginess and helps to create a soft crumb for the cake.
• Large eggs – bind the ingredients together and provide richness.
• Cocoa powder – adds a subtle chocolate flavor to balance the sweetness.
• Baking soda – helps the cake rise, ensuring a light, airy texture.
• Salt – enhances the flavors, complementing the sweetness.
• Vanilla extract – adds depth and warmth to the overall flavor profile.
• Red food coloring – brings out that classic vibrant color characteristic of a Christmas Red Velvet Layered Cake.
For the Frosting
• Cream cheese – provides a creamy, tangy base for the frosting that pairs beautifully with the cake.
• Unsalted butter – adds richness and a creamy texture to the frosting.
• Powdered sugar – sweetens the frosting, allowing it to achieve the perfect spreadable consistency.
With these simple yet essential ingredients, your Christmas Red Velvet Layered Cake is just moments away from being the highlight of your holiday celebrations!
How to Make Christmas Red Velvet Layered Cake
-
Preheat your oven to 350°F (175°C) and prepare two round cake pans by greasing or lining them. This will ensure your cake comes out easily and retains its lovely shape.
-
Whisk together flour, cocoa powder, baking soda, and salt in a large bowl. Mixing these dry ingredients first helps blend them evenly, giving your cake a consistent texture.
-
Combine sugar, vegetable oil, eggs, buttermilk, red food coloring, and vanilla in another bowl. Beat until smooth, creating a luscious, flavorful batter that’s full of festive cheer.
-
Mix the dry ingredients into the wet mixture gradually. Stir until just combined; don’t overmix, or your cake might be dense instead of light and fluffy.
-
Pour the batter into your prepared pans and bake for 25-30 minutes. Check with a toothpick; it should come out clean when the cakes are perfectly risen and ready.
-
Cream together the softened cream cheese and butter until fluffy while the cakes cool. Gradually add powdered sugar to achieve a thick, creamy frosting that pairs wonderfully with the cake.
-
Layer the cooled cakes with frosting in between. Cover the top and sides generously, making your cake a true showstopper that shines with holiday spirit.
Optional: Decorate with festive sprinkles or fresh berries for an extra holiday touch.
Exact quantities are listed in the recipe card below.
Christmas Red Velvet Layered Cake Variations
Feel free to let your creativity shine with these delightful twists on the classic Christmas Red Velvet Layered Cake!
-
Dairy-Free: Substitute buttermilk with almond or oat milk mixed with a splash of vinegar for a creamy alternative. Enjoy a deliciously moist cake without dairy.
-
Gluten-Free: Use a 1:1 gluten-free flour blend instead of all-purpose flour to cater to gluten-sensitive guests. Everyone will adore the rich flavors!
-
Chocolate Lover's: Add an extra tablespoon of cocoa powder and top with chocolate ganache instead of cream cheese frosting for an indulgent twist. This variation offers a delightful chocolate explosion.
-
Spice It Up: Incorporate a teaspoon of cinnamon or nutmeg into the batter for a warm, spiced flavor that’s perfect for winter festivities. It adds a cozy aroma that pairs wonderfully with the red velvet.
-
Mini Layers: Bake in mini cake pans for bite-sized treats! Layer them with frosting and create individual servings that are perfect for holiday parties.
-
Citrus Zest: Add a teaspoon of orange or lemon zest in the frosting for a refreshing zing that balances the sweetness. This fruity hint will brighten up each bite.
-
Nutty Crunch: Fold in chopped walnuts or pecans into the batter to add a delightful crunch and flavor contrast. This brings a whole new level of texture to your cake.
-
Spicy Kick: Incorporate a pinch of cayenne pepper or crushed red pepper flakes in the batter for a surprising kick. It’s a bold touch that transforms the classic holiday cake into a spicy sensation.
Embrace these variations, and let the holiday spirit infuse delicious surprises into your Christmas Red Velvet Layered Cake!
What to Serve with Christmas Red Velvet Layered Cake?
As you prepare to present your stunning cake, consider these delightful pairings to enhance your holiday feast.
-
Creamy Vanilla Ice Cream: The cool, creamy texture contrasts beautifully with the cake's richness, adding a refreshing balance to each bite.
-
Rich Hot Chocolate: A steaming cup of hot cocoa serves a comforting blend of flavors, making every slice of cake even more indulgent during chilly evenings.
-
Fresh Berries: Juicy raspberries or strawberries accompany the cake with a burst of freshness, brightening the flavors and adding a hint of tartness.
-
Sweetened Whipped Cream: Light and airy whipped cream provides a soft, sweet counterpart, adding a delicious plushness that elevates each slice.
-
Spiced Chai Tea: The warmth of chai tea, with its aromatic spices, complements the cake's cocoa richness, creating a cozy, festive experience.
-
Pecan Pie: Pair a slice of this nutty pie for dessert goodness, balancing the cake's texture with the crunch of pecans and a velvety filling.
-
Fruit Punch: A zesty and colorful fruit punch adds a lively sweetness, perfect for a holiday celebration and refreshing alongside the sumptuous cake.
-
Christmas Cookies: Festive sugar or gingerbread cookies offer a delightful crunch and interact nicely with the cake’s moisture, enhancing the joy of indulging in holiday treats.
How to Store and Freeze Christmas Red Velvet Layered Cake
Room Temperature: Keep your Christmas Red Velvet Layered Cake at room temperature for up to 2 days, covered loosely with plastic wrap or a cake dome to maintain moisture.
Fridge: For longer freshness, store it in the refrigerator for up to a week. Wrap the cake tightly in plastic wrap to prevent it from drying out and absorb any odors.
Freezer: Freeze individual slices or the whole cake by wrapping it securely in plastic wrap and placing it in an airtight container. It can last up to 3 months in the freezer.
Reheating: Thaw slices in the refrigerator overnight before serving. For a warm treat, gently heat in the microwave for about 10-15 seconds.
Make Ahead Options
These Christmas Red Velvet Layered Cakes are perfect for busy home cooks looking to save time during the holiday rush! You can prepare the cake layers up to 3 days in advance; simply bake them, let them cool completely, and then wrap each layer tightly in plastic wrap before refrigerating. The cream cheese frosting can also be made up to 2 days ahead; store it in an airtight container in the fridge to keep it fresh. When you're ready to complete your masterpiece, layer the chilled cakes with frosting and allow them to sit at room temperature for about 30 minutes before serving. This ensures every slice is just as delicious as if it were made fresh, allowing you to enjoy the festivities without stress!
Chef's Helpful Tips
- When making the Christmas Red Velvet Layered Cake, ensure all your ingredients are at room temperature for better emulsification, which leads to a smoother batter.
- Avoid overmixing once you combine the wet and dry ingredients to prevent a dense cake; mix just until incorporated.
- Use an oven thermometer to check the accuracy of your oven temperature, as this can affect baking times and results.
- Finally, allow the cakes to cool completely before frosting to prevent the cream cheese frosting from melting and sliding off.
Christmas Red Velvet Layered Cake Recipe FAQs
How do I choose ripe ingredients for my Christmas Red Velvet Layered Cake?
Absolutely! For the best flavor and texture, ensure your eggs are at room temperature to help them incorporate smoothly into the batter. When selecting buttermilk, look for a rich, creamy consistency; avoid any that appear watery or expired. Fresh ingredients make all the difference!
What is the best way to store leftover cake?
Very simple! Keep your Christmas Red Velvet Layered Cake at room temperature for up to 2 days, covered in plastic wrap or a cake dome to prevent moisture loss. If you want to keep it longer, wrap it tightly in plastic wrap and store it in the refrigerator for up to a week.
Can I freeze my Christmas Red Velvet Layered Cake?
Of course! To freeze, start by allowing the cake to cool completely. Then, wrap each layer in plastic wrap tightly, followed by a layer of aluminum foil for added protection. Place the wrapped cake in an airtight container. This cake can be frozen for up to 3 months.
What should I do if my cake is dense or gummy?
Don't worry, it happens to the best of us! A dense cake might result from overmixing when combining wet and dry ingredients. Make sure to mix just until incorporated. Also, check your oven temperature—if it’s too hot, your cake can rise quickly and then collapse, leading to gumminess. An oven thermometer can be really helpful here.
Are there any dietary considerations I should be aware of for this cake?
Absolutely! For those with gluten sensitivities or allergies, I recommend using a gluten-free flour blend in place of all-purpose flour. Additionally, if you're baking for someone with lactose intolerance, try substituting the buttermilk with almond milk mixed with a tablespoon of vinegar as an alternative, and use dairy-free cream cheese for the frosting.
How long can I keep the frosted cake in the fridge?
Great question! Your frosted Christmas Red Velvet Layered Cake can be safely stored in the refrigerator for about a week. Be sure to wrap it tightly in plastic wrap to keep it fresh and prevent it from absorbing any other smells or flavors from the fridge.
Christmas Red Velvet Layered Cake
Ingredients
Equipment
Method
- Preheat your oven to 350°F (175°C) and prepare two round cake pans by greasing or lining them.
- Whisk together flour, cocoa powder, baking soda, and salt in a large bowl.
- Combine sugar, vegetable oil, eggs, buttermilk, red food coloring, and vanilla in another bowl. Beat until smooth.
- Mix the dry ingredients into the wet mixture gradually, stirring until just combined.
- Pour the batter into your prepared pans and bake for 25-30 minutes. Check with a toothpick.
- Cream together the softened cream cheese and butter until fluffy while the cakes cool.
- Gradually add powdered sugar to achieve a thick, creamy frosting.
- Layer the cooled cakes with frosting in between and cover the top and sides generously.

Leave a Reply